
Owning a gas-powered scooter can be a thrilling experience, zipping through the streets with the wind in your hair. However, to keep the engine of your scooter running smoothly, it’s important to know how to properly maintain it. From regular oil changes to air filter cleanings, taking care of your scooter’s engine will not only prolong its lifespan but also ensure a safe and enjoyable ride every time. In this article, we’ll guide you through the essential steps of maintaining the engine of your gas-powered scooter, so you can keep the good times rolling.
Regular Maintenance
Checking the Oil Level
To ensure the optimal performance of your gas-powered scooter, it is essential to regularly check the oil level. The oil acts as a lubricant, reducing friction and prolonging the life of the engine. To check the oil level, start by locating the oil dipstick, usually located near the engine. Remove the dipstick, wipe it clean, then reinsert it and remove it again to inspect the oil level. The oil level should be between the minimum and maximum markers on the dipstick. If the oil level is too low, add the recommended type and amount of oil.
Changing the Oil
Regularly changing the oil is crucial for maintaining the engine of your gas-powered scooter. Over time, oil can become contaminated with dirt and debris, reducing its effectiveness. To change the oil, first warm up the engine for a few minutes to ensure the oil flows more easily. Next, locate the drain plug underneath the scooter and place a drain pan beneath it. Remove the drain plug, allowing the old oil to drain completely. Once the oil has drained, replace the drain plug and proceed to refill the engine with fresh, clean oil, using the recommended type and amount specified in the owner’s manual.
Inspecting the Air Filter
The air filter plays a vital role in preventing dirt, dust, and debris from entering the engine of your gas-powered scooter. Inspecting the air filter regularly is crucial to ensure it is clean and functioning correctly. To inspect the air filter, locate the air filter housing, usually found near the carburetor or intake system. Remove the housing and carefully inspect the air filter. If the filter appears dirty or clogged, it is essential to clean or replace it.
Replacing the Air Filter
If during the inspection the air filter is found to be dirty or clogged, it is necessary to replace it. A dirty air filter can restrict airflow to the engine, negatively impacting its performance. To replace the air filter, remove the old filter from the air filter housing and discard it. Install a new, clean air filter in its place, ensuring it fits securely and is properly seated in the housing. Reattach the air filter housing to the scooter and secure it tightly.
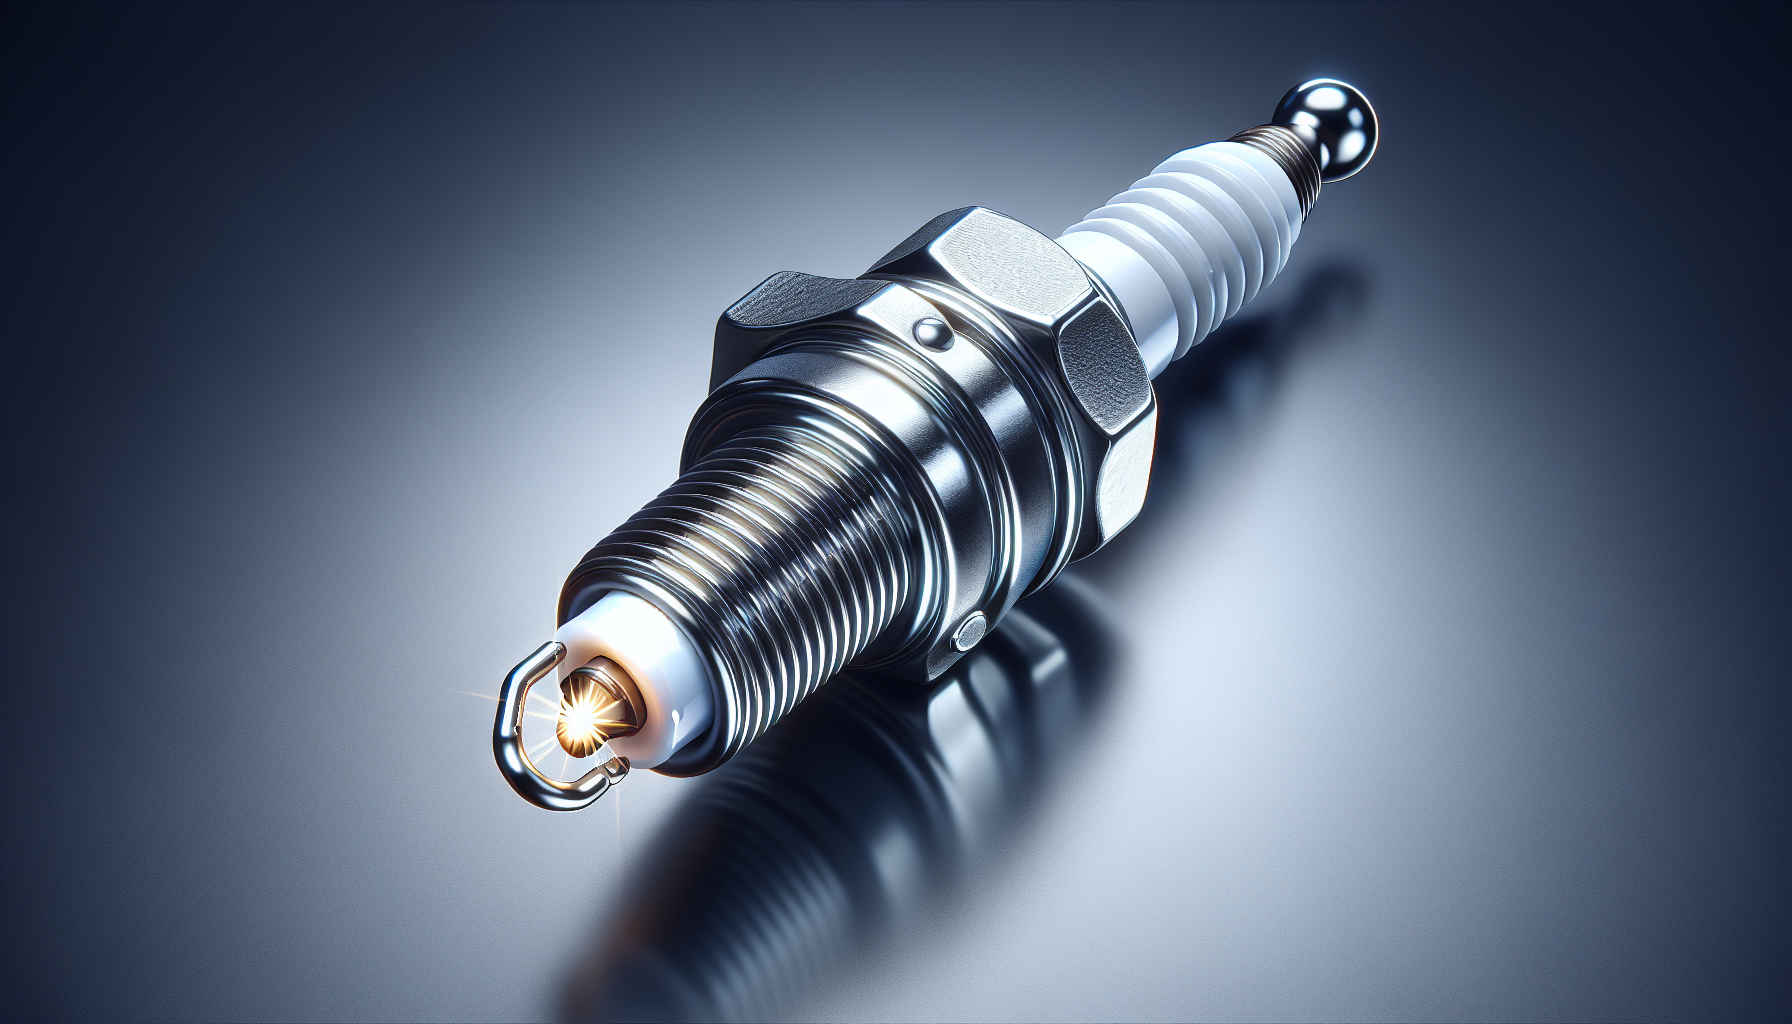
Inspecting the Spark Plug
The spark plug is a critical component of the engine’s ignition system. It ignites the air-fuel mixture, initiating the combustion process that powers your gas-powered scooter. Regularly inspecting the spark plug is necessary to ensure it is in good condition and functioning correctly. To inspect the spark plug, remove the spark plug wire and use a spark plug socket to remove the plug from the engine. Carefully inspect the plug for any signs of wear, damage, or carbon buildup. If the spark plug is worn or damaged, it should be replaced.
Cleaning or Replacing the Spark Plug
If the spark plug appears dirty or fouled with carbon deposits, it can be cleaned using a wire brush or spark plug cleaner. Gently brush away any debris, being careful not to damage the electrode or insulator. However, if the spark plug is excessively worn, damaged, or corroded, it is best to replace it with a new one. When installing a new spark plug, be sure to tighten it to the manufacturer’s specifications to ensure proper operation.
Checking the Fuel System
Regularly checking the fuel system of your gas-powered scooter is important to maintain its efficiency and prevent potential issues. Start by examining the fuel lines for any signs of cracks, leaks, or damage. Additionally, inspect the fuel tank to ensure it is clean and free of debris. It is also essential to check the fuel filter, usually located in the fuel line, and replace it if necessary.
Inspecting and Adjusting the Carburetor
The carburetor is responsible for mixing the air and fuel in the correct proportions for combustion. Inspecting and adjusting the carburetor can improve the performance and fuel efficiency of your gas-powered scooter. Start by visually inspecting the carburetor for any signs of damage or wear. Next, check the idle speed and adjust it if necessary according to the manufacturer’s specifications. It is also important to inspect and clean the carburetor jets to ensure they are not clogged or obstructed.
Inspecting the Drive Belt
The drive belt is an integral part of the scooter’s transmission system, transferring power from the engine to the wheels. Regularly inspecting the drive belt is essential to identify any signs of wear or damage. Check the belt for cracks, fraying, or glazing, which can affect its performance. If any issues are detected, it is necessary to realign or replace the drive belt to ensure optimal functioning of the scooter.
Realigning or Replacing the Drive Belt
If the drive belt of your gas-powered scooter is misaligned, it can cause poor performance and premature wear. To realign the drive belt, start by loosening the variator’s center nut using the appropriate tools. Once loosened, adjust the position of the drive belt by sliding it on the variator. Ensure the belt is aligned and centered properly, then tighten the variator’s center nut to the manufacturer’s specifications. If the drive belt shows signs of significant wear or damage, it is best to replace it with a new one.
Fuel System Maintenance
Using the Right Fuel
Using the correct fuel is crucial for maintaining the engine of your gas-powered scooter. Gasoline containing too much ethanol or other additives can cause issues and potentially damage the engine. Always use gasoline with the recommended octane rating specified in the owner’s manual. Additionally, try to avoid fueling up with old or stale gasoline, as it can negatively impact the scooter’s performance.
Storing the Scooter with Fuel
If you plan to store your gas-powered scooter for an extended period, it is important to take the necessary steps to properly store the fuel system. Start by adding a fuel stabilizer to the tank, following the manufacturer’s instructions. The fuel stabilizer helps prevent fuel degradation and varnish buildup in the fuel system during storage. It is also advisable to run the engine for a few minutes after adding the stabilizer to ensure it circulates throughout the system.
Inspecting the Fuel Lines
Inspecting the fuel lines regularly is crucial to ensure they are in good condition and free from cracks, leaks, or blockages. Start by visually inspecting the fuel lines from the fuel tank to the carburetor or fuel injectors, looking for any signs of damage or deterioration. Ensure that the fuel lines are securely connected and properly routed. If any issues are detected, it is important to replace the fuel lines to maintain the proper fuel flow to the engine.
Cleaning the Fuel Tank
Over time, dirt, debris, and rust particles can accumulate in the fuel tank, potentially causing clogs or fuel system issues. Regularly cleaning the fuel tank can help prevent these issues and maintain the engine’s performance. Start by draining the fuel tank completely, either by using the drain bolt or siphoning the fuel out. Once empty, remove the tank and clean it thoroughly using a fuel tank cleaner and brush. Rinse the tank with water and allow it to dry completely before reinstalling.
Cleaning the Carburetor
The carburetor plays a crucial role in the fuel system, and it can become clogged with dirt, varnish, or debris over time. Cleaning the carburetor regularly can help maintain proper fuel delivery and prevent performance issues. Carefully disassemble the carburetor, taking note of the various components and their positions. Soak the disassembled parts in carburetor cleaner, following the manufacturer’s instructions. Use a small brush to scrub away any residue or buildup. Rinse the parts thoroughly with clean water, then reassemble the carburetor and reinstall it.
Fuel Additives for Maintenance
Using fuel additives periodically can help maintain the fuel system’s cleanliness and performance. Fuel additives are designed to remove deposits, improve combustion, and prevent varnish buildup. Additives can be added directly to the fuel tank according to the manufacturer’s instructions. However, it is important to note that additives should be used as recommended and not as a substitute for regular maintenance and inspections.
Cooling System Maintenance
Checking the Coolant Level
The cooling system is vital for preventing your gas-powered scooter’s engine from overheating. Regularly checking the coolant level ensures proper cooling system function. Start by locating the coolant reservoir, usually near the radiator. Ensure the scooter is on level ground, then remove the reservoir cap and visually inspect the coolant level. The coolant should be between the minimum and maximum marks on the reservoir. If the level is low, add the appropriate coolant mixture to the reservoir.
Flushing the Cooling System
Flushing the cooling system periodically helps remove any contaminants or debris that may have accumulated over time. To flush the cooling system, start by draining the coolant from the system. Locate the drain plug at the bottom of the radiator and place a drain pan beneath it. Remove the drain plug and allow the coolant to drain completely. Once drained, close the drain plug and proceed to flush the system with a radiator flush solution or a mixture of water and coolant. Follow the manufacturer’s instructions and perform a final flush with clean water before refilling the system with fresh coolant.
Inspecting and Replacing the Radiator Cap
The radiator cap is an essential component of the cooling system, helping maintain the proper pressure and temperature. Regularly inspecting and replacing the radiator cap can prevent coolant loss and overheating issues. To inspect the radiator cap, ensure the engine is cool, then remove the cap and inspect the rubber seal. If the seal appears damaged or worn, it is advisable to replace the radiator cap with a new one.
Cleaning the Cooling Fins
The cooling fins on the scooter’s engine help dissipate heat and maintain proper cooling. Over time, the cooling fins can become clogged with dirt, dust, or debris, reducing their efficiency. Regularly cleaning the cooling fins ensures optimal cooling system performance. Start by using compressed air or a soft brush to remove any loose debris from the fins. If needed, use a mild detergent and water solution to clean the fins more thoroughly, ensuring you rinse them properly and allow them to dry before starting the engine.
Verifying the Radiator Fan Operation
The radiator fan assists in cooling the engine by drawing air through the radiator. It is important to ensure that the radiator fan is functioning correctly to prevent the engine from overheating. Start by visually inspecting the fan blades for any signs of damage or obstruction. With the engine running, listen for the fan to engage as the engine temperature rises. If the fan does not engage, it may be necessary to troubleshoot or replace the fan motor or associated components.
Checking the Battery
Inspecting the Battery Terminals
The battery is essential for starting your gas-powered scooter and providing power to the electrical system. Regularly inspecting the battery terminals ensures a secure and reliable connection. Start by visually inspecting the battery terminals for any signs of corrosion, loose connections, or damage. Corrosion on the terminals can be cleaned using a mixture of baking soda and water and a wire brush. Ensure the terminals are tight and free of any debris or corrosion before reconnecting them.
Cleaning the Battery Terminals
Corrosion on the battery terminals can impede the flow of electricity and cause starting or electrical system issues. To clean the battery terminals, start by disconnecting the negative (-) terminal first, followed by the positive (+) terminal. Using a mixture of baking soda and water, apply the solution to the terminals and surrounding areas using a brush. Scrub away any corrosion or buildup, then rinse the terminals with clean water. Once dry, reattach the terminals, starting with the positive (+) terminal, and secure them tightly.
Checking the Battery Voltage
Checking the battery voltage helps ensure it is holding an adequate charge and functioning properly. To check the battery voltage, you will need a multimeter. Start by setting the multimeter to the DC voltage setting. Attach the red probe to the battery’s positive terminal and the black probe to the negative terminal. The multimeter should display the battery’s voltage. A fully charged battery typically reads around 12.6 volts. If the battery voltage is significantly lower, it may need to be charged or replaced.
Charging or Replacing the Battery
If the battery voltage is low, it may need to be charged using an appropriate battery charger. Follow the charger manufacturer’s instructions to correctly connect the charger to the battery and charge it to the recommended voltage. If the battery fails to hold a charge or is significantly degraded, it may be necessary to replace it with a new one. Ensure the replacement battery is compatible with your scooter’s specifications and installation instructions.
Using a Battery Tender
A battery tender or maintainer is a device that can help keep your scooter’s battery charged during periods of inactivity or storage. It connects to the battery and provides a low, constant charge to keep it at an optimal level. To use a battery tender, follow the manufacturer’s instructions to connect it to the battery. It is important to use a battery tender specifically designed for the voltage and type of battery used in your gas-powered scooter.
Drive Train Maintenance
Inspecting and Lubricating the Chain
The drive chain is a crucial component of the scooter’s drive train, transferring power from the engine to the wheels. Regularly inspecting and lubricating the chain ensures smooth operation and prolongs its lifespan. Start by visually inspecting the chain for any signs of wear, damage, or loose links. Use a chain lubricant that is specifically formulated for motorcycle or scooter chains to lubricate the chain, following the manufacturer’s instructions. Proper lubrication helps reduce friction and corrosion, extending the chain’s life.
Checking the Chain Tension
Proper chain tension is essential for optimal performance and safety. A loose chain can cause poor acceleration, increased wear, and even chain slipping. To check the chain tension, locate the chain adjusters on the swingarm. Loosen the axle nut slightly, then adjust the chain tension by turning the adjusters equally on both sides until the chain has the correct amount of slack. Follow the manufacturer’s specifications for the recommended chain tension.
Adjusting the Chain Tension
If the chain tension is not within the recommended specifications, it may be necessary to adjust it. Start by loosening the axle nut slightly to allow for adjustment. Turn the chain adjusters equally on both sides until the chain has the correct amount of slack. Ensure the chain is straight and parallel to the swingarm, then re-tighten the axle nut to the manufacturer’s specifications.
Replacing the Chain
Over time, a chain may become stretched, worn, or damaged, requiring replacement. Regularly inspecting the chain can help identify any issues and determine when replacement is necessary. To replace the chain, start by loosening the axle nut and removing the old chain from the sprockets. Install the new chain, ensuring it is properly aligned on the sprockets and has the correct tension. Follow the manufacturer’s instructions to properly adjust and secure the chain.
Lubricating the Throttle and Brake Cables
Properly functioning throttle and brake cables are essential for safe and smooth operation of your gas-powered scooter. Regularly inspecting and lubricating these cables ensures their optimal performance. Start by visually inspecting the cables for any signs of fraying, damage, or sticking. Use a cable lubricant or a lightweight oil to lubricate the cables, applying a small amount at the ends and along their length. Move the cables back and forth to distribute the lubricant evenly.
Inspecting and Adjusting the Clutch
The clutch is responsible for engaging and disengaging the power transfer from the engine to the wheels. Regularly inspecting and adjusting the clutch ensures smooth and reliable operation. Start by visually inspecting the clutch components for any signs of wear, damage, or glazing. If the clutch is not engaging or disengaging correctly, it may require adjustment. Consult the scooter’s service manual for the specific clutch adjustment procedure and follow it carefully.
Brake Maintenance
Checking the Brake Fluid Level
Proper brake fluid level is crucial for the safe and effective operation of your scooter’s brakes. Regularly checking the brake fluid level ensures the system has an adequate supply of fluid. Start by locating the brake fluid reservoir, usually located near the handlebars or on the brake caliper. Ensure the scooter is on level ground, then remove the reservoir cap and visually inspect the fluid level. The brake fluid should be between the minimum and maximum marks on the reservoir. If the level is low, it may indicate a leak or worn brake pads and should be addressed promptly.
Flushing and Replacing the Brake Fluid
Brake fluid can degrade over time due to moisture absorption and heat, compromising its effectiveness. Periodically flushing and replacing the brake fluid helps maintain the brake system’s performance. To flush the brake fluid, start by opening the bleeder valve on the brake caliper using a wrench and attaching a clear tube that leads into a container. Have an assistant pump the brake lever or pedal while maintaining pressure, then close the bleeder valve. Proceed to bleed the brake system until clean, fresh fluid is visible. Repeat this process for each brake caliper.
Inspecting and Adjusting the Brake Pads
The brake pads are a critical component of the braking system. Regularly inspecting and adjusting the brake pads ensures they are in good condition and properly contacting the brake disc or drum. Start by visually inspecting the brake pads for any signs of excessive wear or damage. Measure the pad thickness using a caliper and compare it to the manufacturer’s specified thickness. If the brake pads are worn beyond the recommended thickness, they should be promptly replaced.
Inspecting and Adjusting the Brake Calipers
The brake calipers are responsible for exerting pressure on the brake pads, causing them to engage the brake disc or drum. Regularly inspecting and adjusting the brake calipers ensures they are in good working condition. Start by visually inspecting the calipers for any signs of leaks, damage, or sticking. Ensure the calipers move freely and are not excessively worn. If any issues are detected, it may be necessary to replace or rebuild the brake calipers.
Inspecting and Adjusting the Brake Lines
The brake lines carry hydraulic fluid from the brake master cylinder to the brake calipers, enabling effective braking action. Regularly inspecting the brake lines ensures they are in good condition and free from leaks or damage. Start by visually inspecting the brake lines for any signs of cracks, bulging, or abrasions. Ensure the fittings are tight and secure. If any issues are detected, it is crucial to replace the brake lines to maintain proper brake system function.
Test Riding and Bedding in New Brake Pads
If you have recently replaced the brake pads, it is important to bed them in to ensure optimal performance and longevity. Bedding in the brake pads involves gradually increasing their temperature and mating them to the brake discs or drums. Start by performing several moderate stops from a moderate speed, allowing the brakes to cool between stops. Avoid heavy or prolonged braking during the bedding-in process. After completing the recommended bedding-in procedure, test the brakes to ensure they are operating smoothly and effectively.
Tire Maintenance
Checking the Tire Pressure
Proper tire pressure is essential for maintaining safe and efficient operation of your gas-powered scooter. Regularly checking the tire pressure helps ensure optimal handling and extends tire life. Start by using a tire pressure gauge to measure the pressure in each tire. The recommended tire pressure can typically be found in the owner’s manual or on a sticker located near the tires. If the tire pressure is too low or too high, adjust it accordingly using an air pump or by releasing air with a valve stem tool.
Inflating or Deflating the Tires
Maintaining the correct tire pressure is crucial for safe and efficient operation. If the tire pressure is below the recommended level, it is necessary to inflate the tires. Use an air pump or an air compressor with a pressure gauge to add air to the tires, being careful not to exceed the maximum pressure indicated on the tire sidewall. Conversely, if the tire pressure is too high, use a valve stem tool to release air until the desired pressure is reached.
Inspecting the Tread Wear
Regularly inspecting the tire tread wear is important for maintaining optimal traction and ensuring safe riding conditions. Start by visually inspecting the tread of each tire, looking for any signs of uneven wear, bulges, or punctures. Check the tread depth using a tread depth gauge or the built-in indicators located in the tire’s grooves. If the tread depth is near or below the minimum allowable depth, it is necessary to replace the tires to ensure proper grip and control.
Aligning and Balancing the Wheels
Proper wheel alignment and balancing are crucial for optimal handling and tire wear. Regularly aligning and balancing the wheels helps prevent uneven wear and ensures a smooth ride. Wheel alignment typically requires specialized equipment and expertise, so it is best to have it performed by a professional. Wheel balancing involves adding small weights to the wheel rim to counterbalance any weight discrepancies. This can also be done by a professional using specialized equipment.
Replacing the Tires
Over time, tires can become worn, damaged, or aged, reducing their effectiveness and safety. Regularly inspecting the tires helps identify any issues and determine when replacement is necessary. When replacing the tires, it is important to select ones that are compatible with your specific scooter model and riding conditions. Follow the manufacturer’s recommendations regarding tire size, load rating, and speed rating. Proper installation and inflation are critical for ensuring optimal performance and safety.
Rotating the Tires
Rotating the tires helps promote more even wear and prolong tire life. The specific tire rotation pattern may vary depending on your scooter’s design and tire type. Consult the owner’s manual or seek professional guidance to identify the appropriate tire rotation method for your scooter. Regular tire rotations should be performed at the recommended intervals or as advised by the tire manufacturer or service professional.
Electrical System Maintenance
Checking the Lights and Signals
Regularly checking the lights and signals on your gas-powered scooter is essential for safety and compliance with traffic regulations. Start by inspecting all the lights, including the headlights, taillights, brake lights, and turn signals. Ensure they are clean, undamaged, and functioning properly. Replace any faulty bulbs promptly to maintain optimal visibility on the road.
Replacing Faulty Bulbs
Faulty bulbs can impair visibility, compromise safety, and result in traffic violations. If any of the lights on your gas-powered scooter are not illuminating correctly, it is necessary to replace the faulty bulbs promptly. Consult the owner’s manual or seek professional guidance to determine the appropriate replacement bulbs for your specific model. Follow the recommended procedures to safely and correctly replace the faulty bulbs.
Inspecting the Wiring
Regularly inspecting the wiring of your gas-powered scooter can help identify any potential issues or damage that may affect the electrical system’s performance. Visually inspect the wiring harness for any signs of fraying, pinching, or loose connections. Ensure that all connections are secure and properly insulated. If any wiring issues are detected, it is important to address them promptly to prevent electrical malfunctions or failures.
Testing the Charging System
The charging system is responsible for keeping the scooter’s battery charged while the engine is running. Regularly testing the charging system helps identify any issues or malfunctions that may affect the battery’s performance. Start by using a multimeter to measure the battery voltage with the engine off. Next, start the engine and recheck the voltage. The voltage should increase when the engine is running, indicating that the charging system is functioning properly. If the voltage does not increase, it may be necessary to troubleshoot or replace the charging system components.
Replacing the Voltage Regulator
The voltage regulator is responsible for maintaining a consistent voltage output from the charging system. If the voltage regulator malfunctions, it may result in overcharging or undercharging of the battery. Regularly inspecting and replacing the voltage regulator, if necessary, can help ensure proper charging system function. Consult the service manual or seek professional guidance to correctly identify and replace the voltage regulator.
Inspecting and Cleaning the Switches
The switches on your gas-powered scooter, such as the ignition switch and the various control switches, are critical for proper operation and control. Regularly inspecting and cleaning the switches helps ensure smooth operation and prolongs their lifespan. Start by visually inspecting the switches for any signs of wear, damage, or sticking. Use a contact cleaner or electrical cleaning spray to clean the switches, following the product’s instructions. Ensure that the switches move freely and make proper contact.
Body and Frame Maintenance
Cleaning the Scooter
Regularly cleaning your gas-powered scooter helps maintain its appearance and prevent the buildup of dirt or corrosive substances. Start by using a gentle detergent and a soft cloth or sponge to clean the body and frame of the scooter. Pay attention to hard-to-reach areas and remove any dirt or debris. Rinse the scooter with clean water and dry it thoroughly with a soft cloth. Apply a protective wax or polish to help prevent corrosion and maintain the scooter’s shine.
Inspecting and Lubricating the Bearings
The bearings on your gas-powered scooter enable smooth movement and reduce friction in various components. Regularly inspecting and lubricating the bearings helps maintain their proper functioning and prolong their lifespan. Start by visually inspecting the bearings for any signs of wear, damage, or excessive play. If any issues are detected, it may be necessary to replace the bearings. Apply an appropriate lubricant to the bearings according to the manufacturer’s instructions to ensure smooth operation.
Inspecting and Tightening the Bolts
Regularly inspecting and tightening the bolts on your gas-powered scooter helps maintain its structural integrity and safety. Start by visually inspecting all the bolts and fasteners on the scooter, ensuring they are tight and properly seated. Use the appropriate tools to tighten any loose bolts, paying particular attention to critical areas such as the handlebars, suspension components, and engine mounts. Be sure not to overtighten the bolts, as this can cause damage or stripping.
Paint and Corrosion Protection
The paint and finish on your gas-powered scooter not only add to its aesthetic appeal but also protect it from corrosion. Regularly inspecting the paintwork for chips, scratches, or signs of rust is essential for maintaining the scooter’s appearance and preventing further damage. Touch up any areas of exposed metal with an appropriate paint or protective coating to prevent corrosion. Applying a wax or sealant to the body and frame can also help protect against environmental elements and maintain the scooter’s finish.
Inspecting and Replacing the Mirrors
Properly functioning mirrors are crucial for safe riding and situational awareness on your gas-powered scooter. Regularly inspecting the mirrors for any signs of damage, loose connections, or reduced visibility helps ensure their effectiveness. If any issues are detected, such as cracked or broken mirrors, it is necessary to promptly replace them with new ones. Follow the manufacturer’s recommendations for mirror replacement and ensure they are properly adjusted for optimal visibility.
Storage and Winterization
Preparing for Long-Term Storage
If you plan to store your gas-powered scooter for an extended period, proper preparation is crucial to prevent potential issues and ensure it remains in good condition. Start by thoroughly cleaning the scooter and allowing it to dry completely. Apply a coat of wax or protective sealant to the body and frame to prevent corrosion during storage. Change the oil and filter to remove any contaminants that could deteriorate over time. Fill the fuel tank and add a fuel stabilizer to prevent the fuel from degrading. Finally, remove the battery and store it in a cool, dry place or use a battery tender to maintain its charge.
Storing the Scooter in a Dry Place
Proper storage conditions are essential for maintaining the longevity and performance of your gas-powered scooter. If possible, store the scooter in a dry, temperature-controlled environment, such as a garage or storage unit. Keeping the scooter protected from moisture, extreme temperatures, and sunlight helps prevent corrosion, fading, and deterioration of various components. If storing the scooter outdoors is unavoidable, consider using a motorcycle cover specifically designed to protect against the elements.
Fuel System Storage Preparation
Before storing your gas-powered scooter, it is important to properly prepare the fuel system to prevent fuel degradation and potential issues. Start by adding a fuel stabilizer to the tank, following the manufacturer’s instructions. The fuel stabilizer helps prevent the fuel from deteriorating and causing varnish or gum buildup in the fuel system. After adding the stabilizer, run the engine for a few minutes to ensure the treated fuel circulates throughout the system, protecting it during storage.
Battery Maintenance during Storage
If you are storing your gas-powered scooter for an extended period, it is important to properly maintain the battery to ensure its longevity and reliable performance. Start by removing the battery from the scooter, disconnecting the negative (-) terminal first, then the positive (+) terminal. Thoroughly clean the battery terminals using a mixture of baking soda and water and a wire brush. Next, store the battery in a cool, dry place away from any flammable materials. Periodically check the battery voltage and recharge it as needed to prevent it from discharging completely.
Tire Maintenance during Storage
Properly maintaining the tires during storage helps prevent flat spots, cracking, and deterioration. Start by inflating the tires to the recommended pressure to ensure they maintain their shape. If possible, elevate the scooter off the ground using a center stand or paddock stand to minimize stress on the tires. To further prevent flat spots, periodically rotate the tires or move the scooter slightly to redistribute the weight. Avoid storing the scooter in direct sunlight or near sources of heat, as excessive heat can accelerate tire aging and damage.